
How to: Design in Think, Code in Codex
Overview
You design the application in Think4Ever, from business intent to approved blueprint and UI screens. Then OpenAI Codex builds it on your computer, reading the design from Think4Ever over MCP. Think4Ever stays the design source of truth while Codex writes and tests the code, on your own OpenAI subscription.
This guide follows a real example, AppointFlow: an appointment booking system that connects customers with service providers, with separate dashboards for customers, providers and administrators. It covers:
- Designing the app from intent and approving the blueprint
- Choosing a theme and generating the UI screens
- Connecting Codex to Think4Ever
- Handing Codex a build brief and verifying what it builds
The same approach works with Claude Code. See How to: Design in Think, Code in Claude.
Before you start
You need:
- A Think4Ever account
- Codex installed and signed in with your OpenAI account
- Node.js, so Codex can run the npx bridge that connects it to Think4Ever
- An empty folder on your computer for the application
Keep access tokens out of screenshots and out of source control.
Step 1: Design the app in Think4Ever
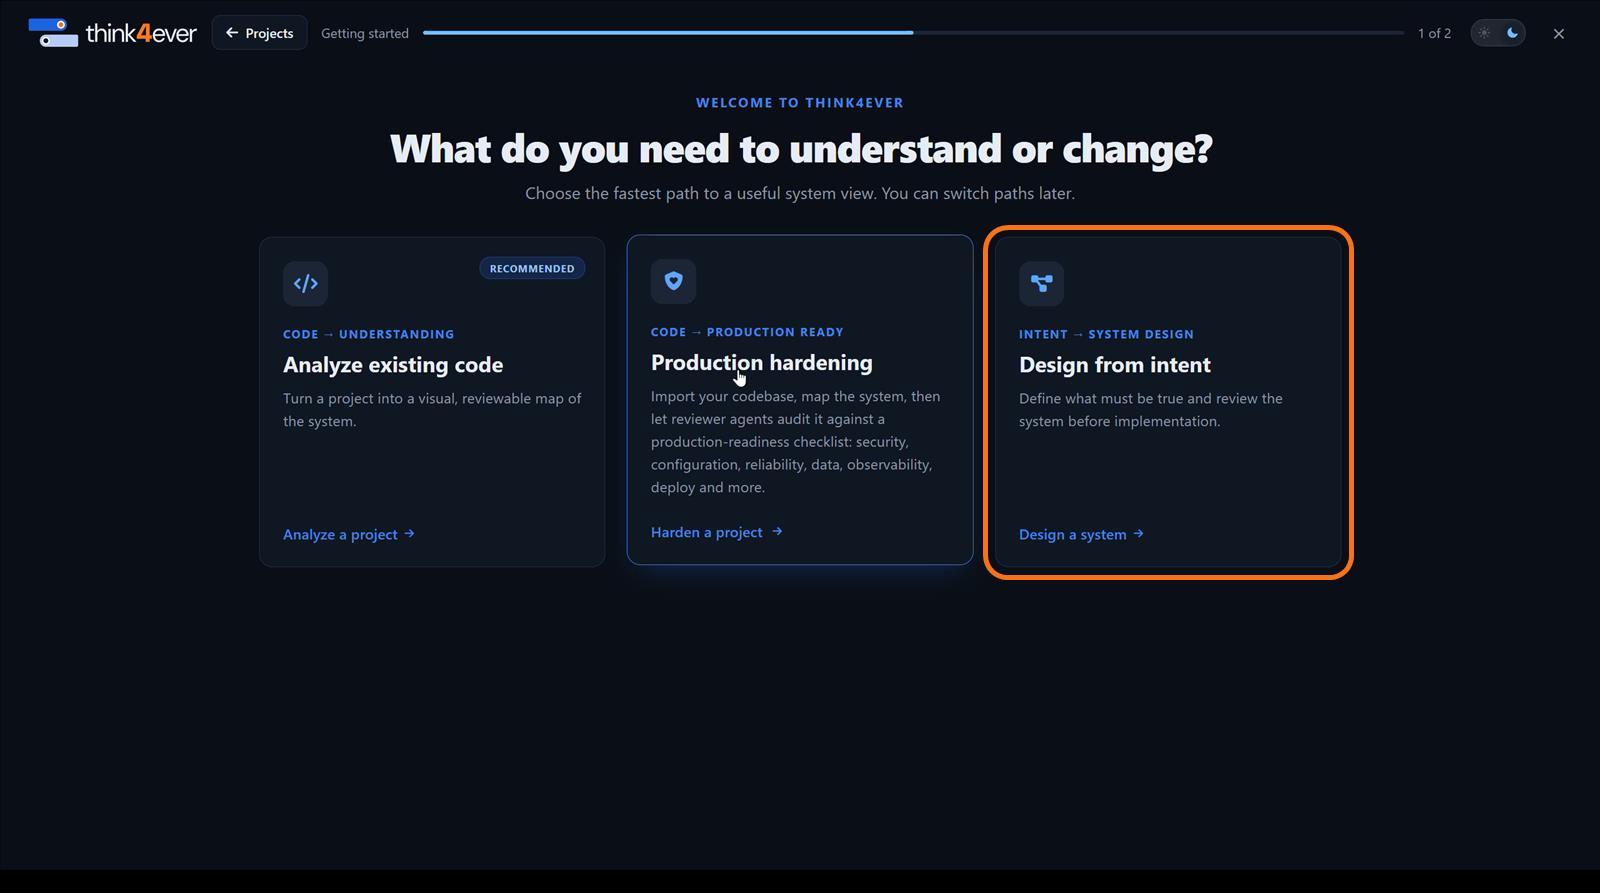
- Choose Design from intent. Create a project and pick Design from intent → Design a system. This route turns a business outcome into a reviewable system design before any code is written.
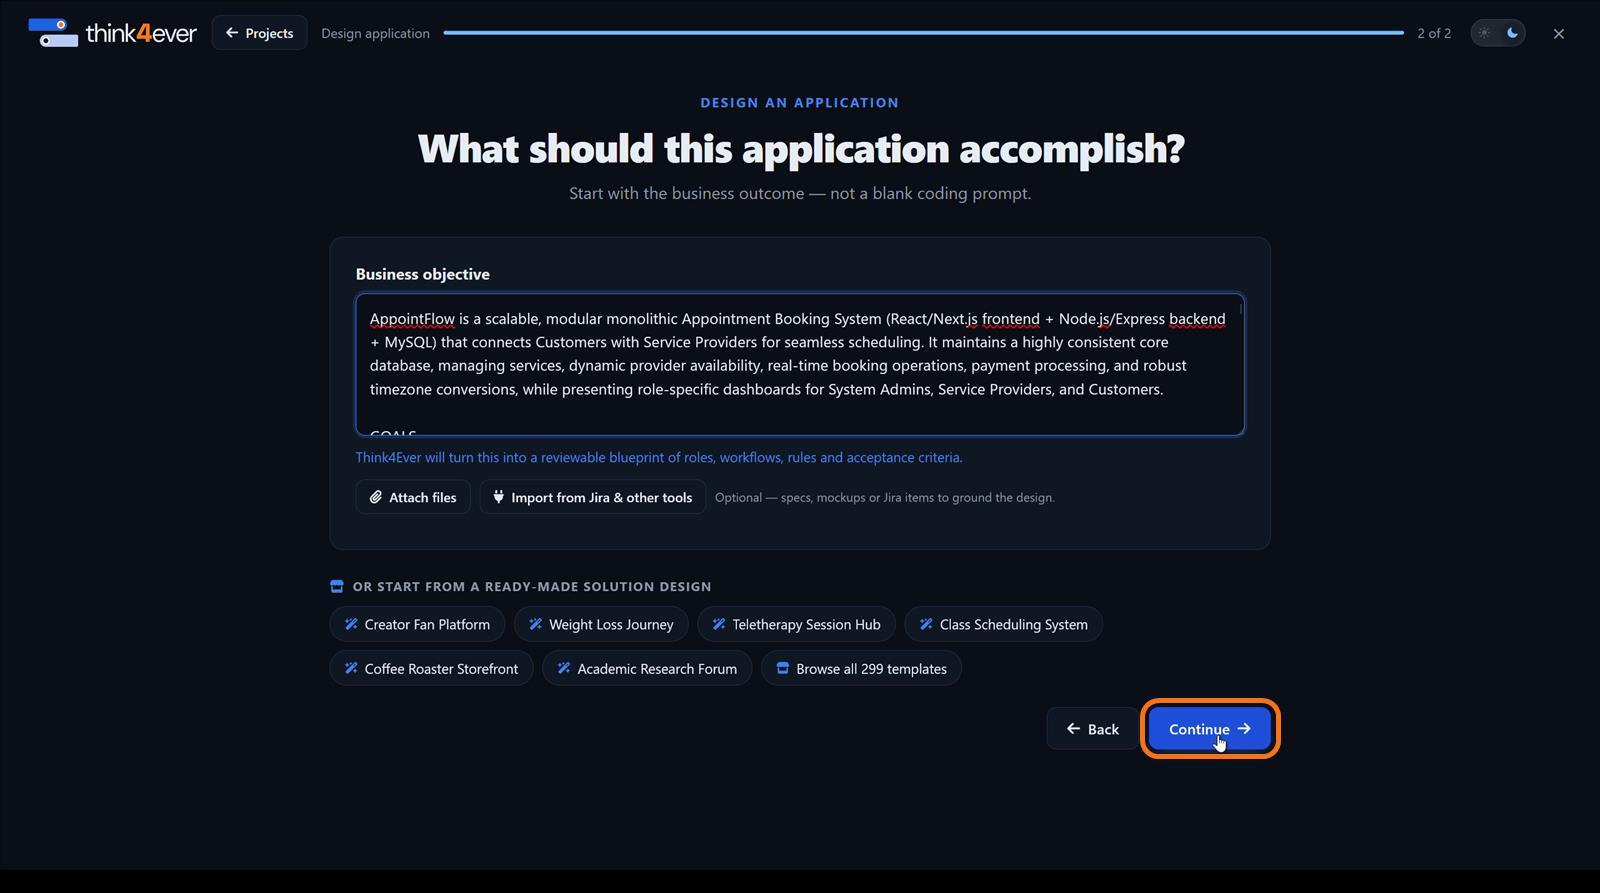
- Describe the business objective. Say what the application should accomplish: the users, main workflows, business constraints, preferred tech stack, integrations, and what success looks like. Attach specs or mockups if they matter. Then click Continue.
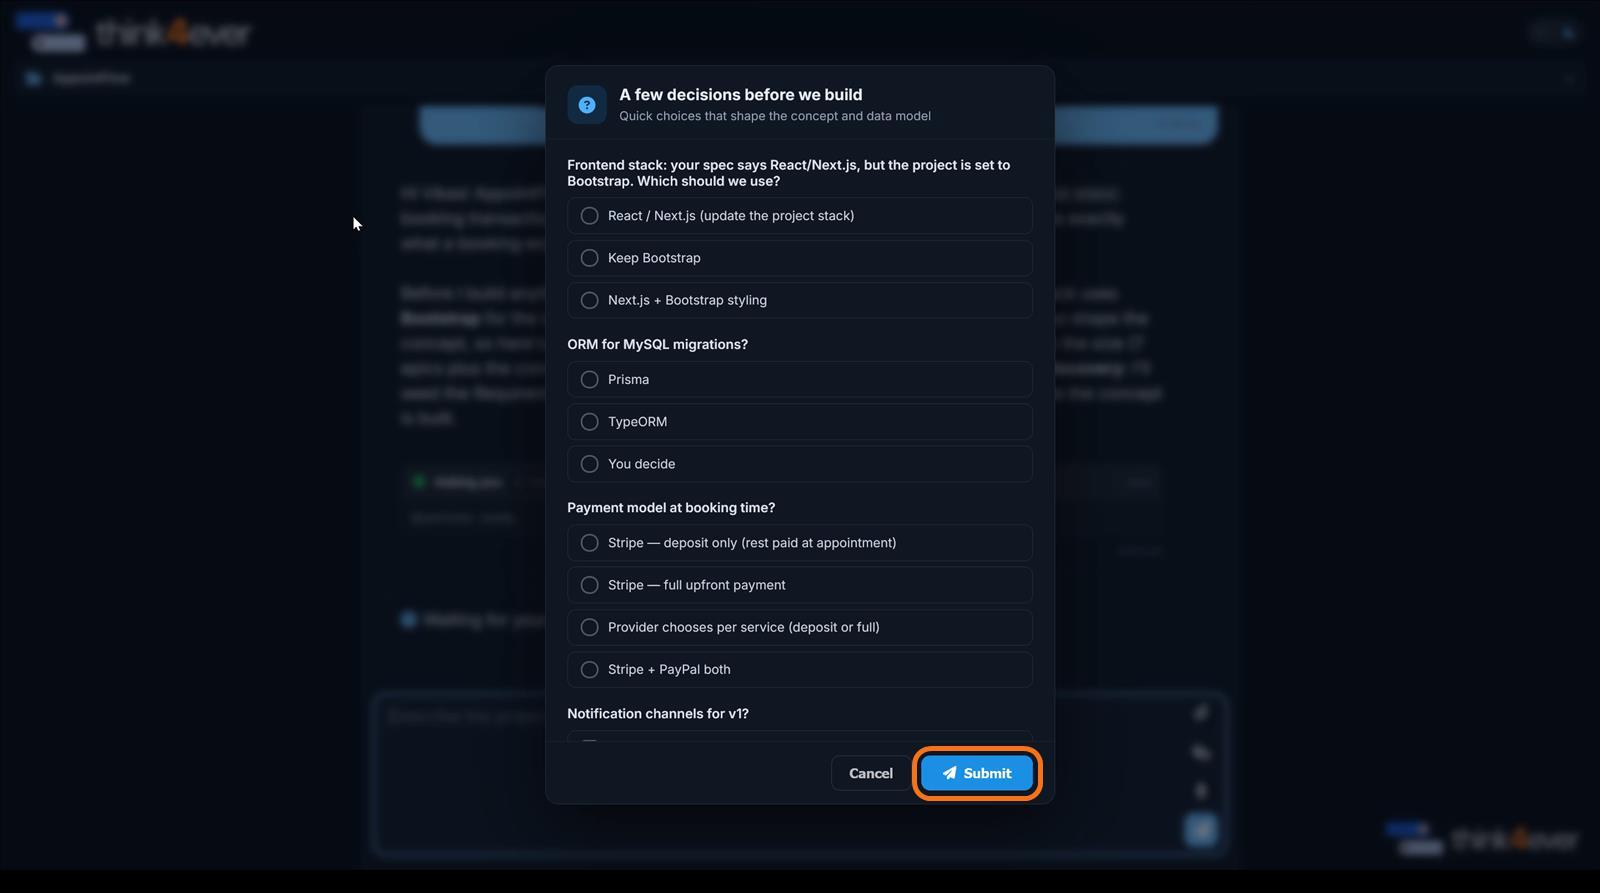
- Resolve the first decisions. Think4Ever flags conflicts and open choices in your description, such as a stack mismatch, the ORM, the payment model and notification channels. Pick the intended option for each so the design does not rest on hidden assumptions, then click Submit.
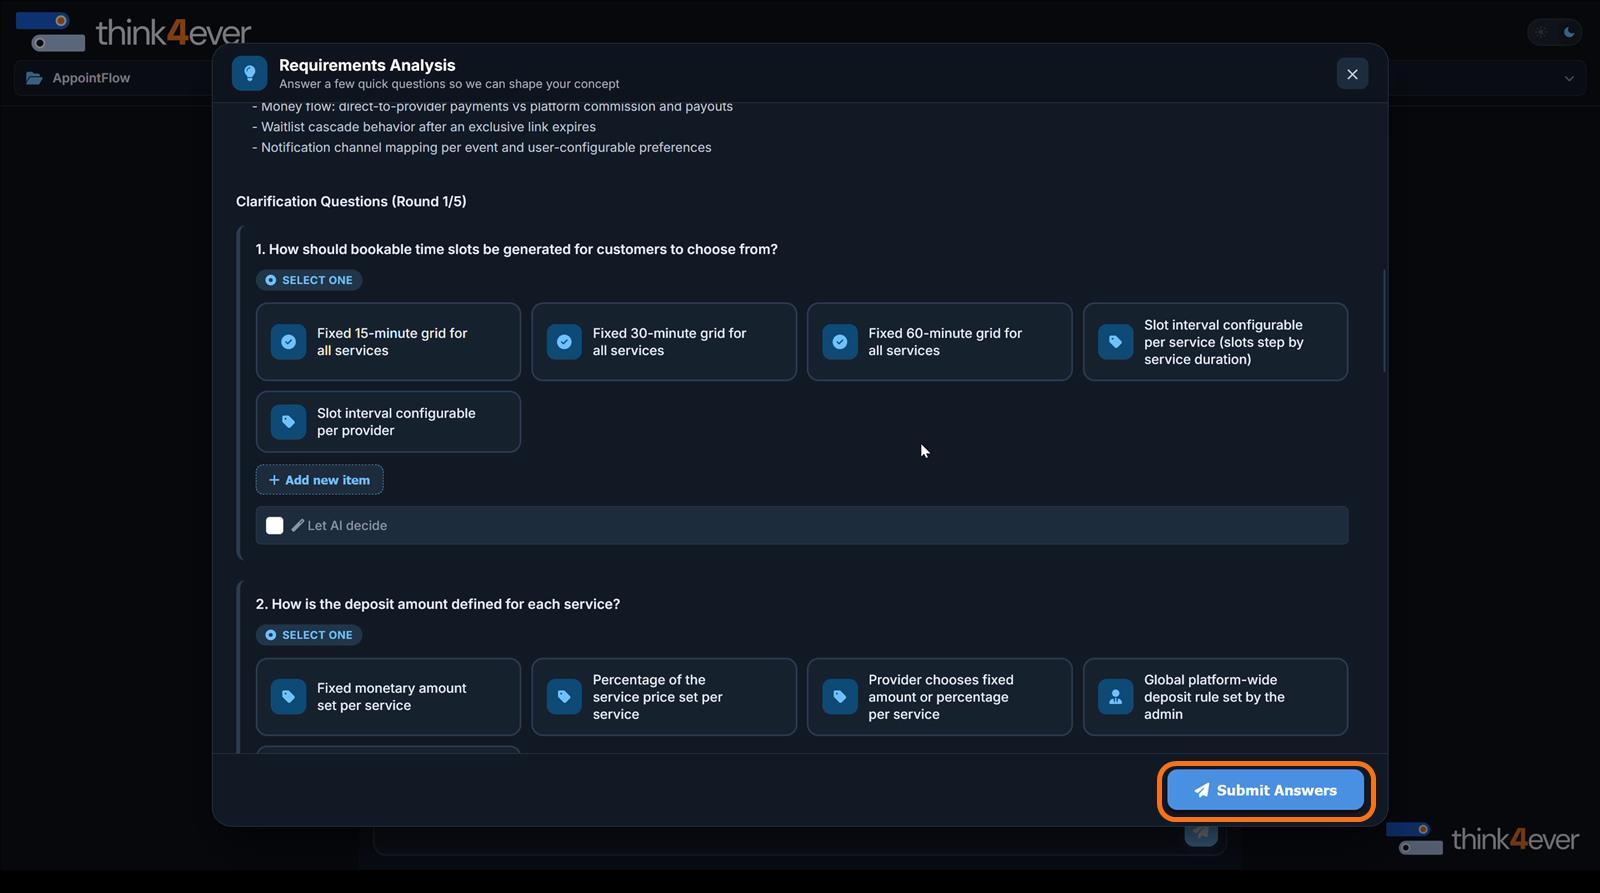
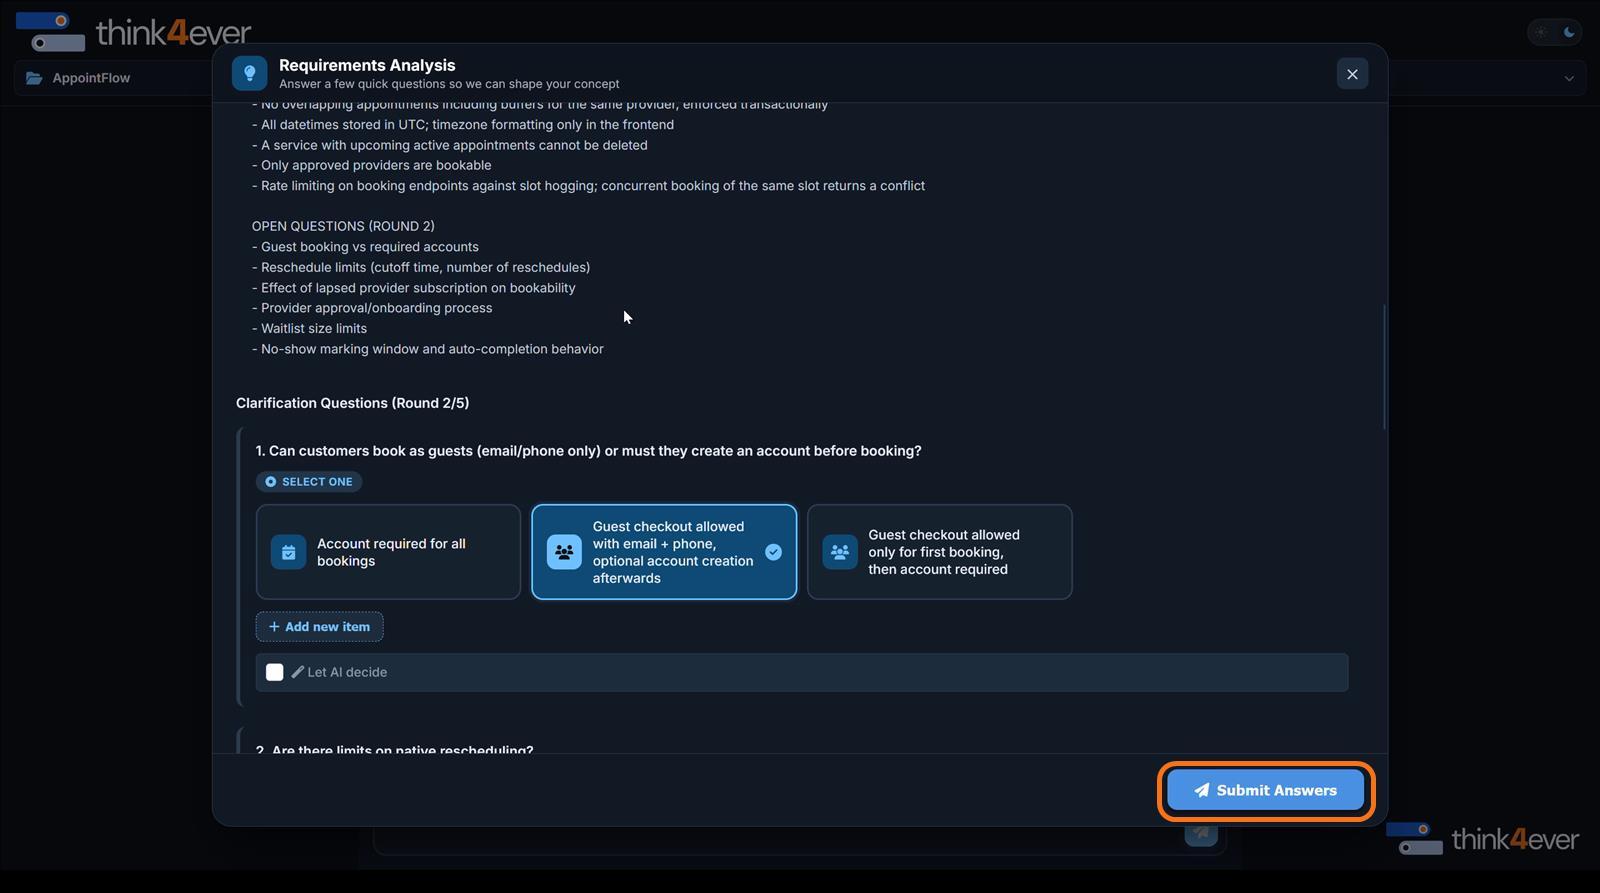
- Work through the Requirements Analysis rounds. Each round asks more specific questions, for example how booking slots are generated, how deposits work, or whether customers can book as guests. Choose the matching option, add your own answer with Add new item, or tick Let AI decide only when the choice really does not matter. Click Submit Answers after each round.
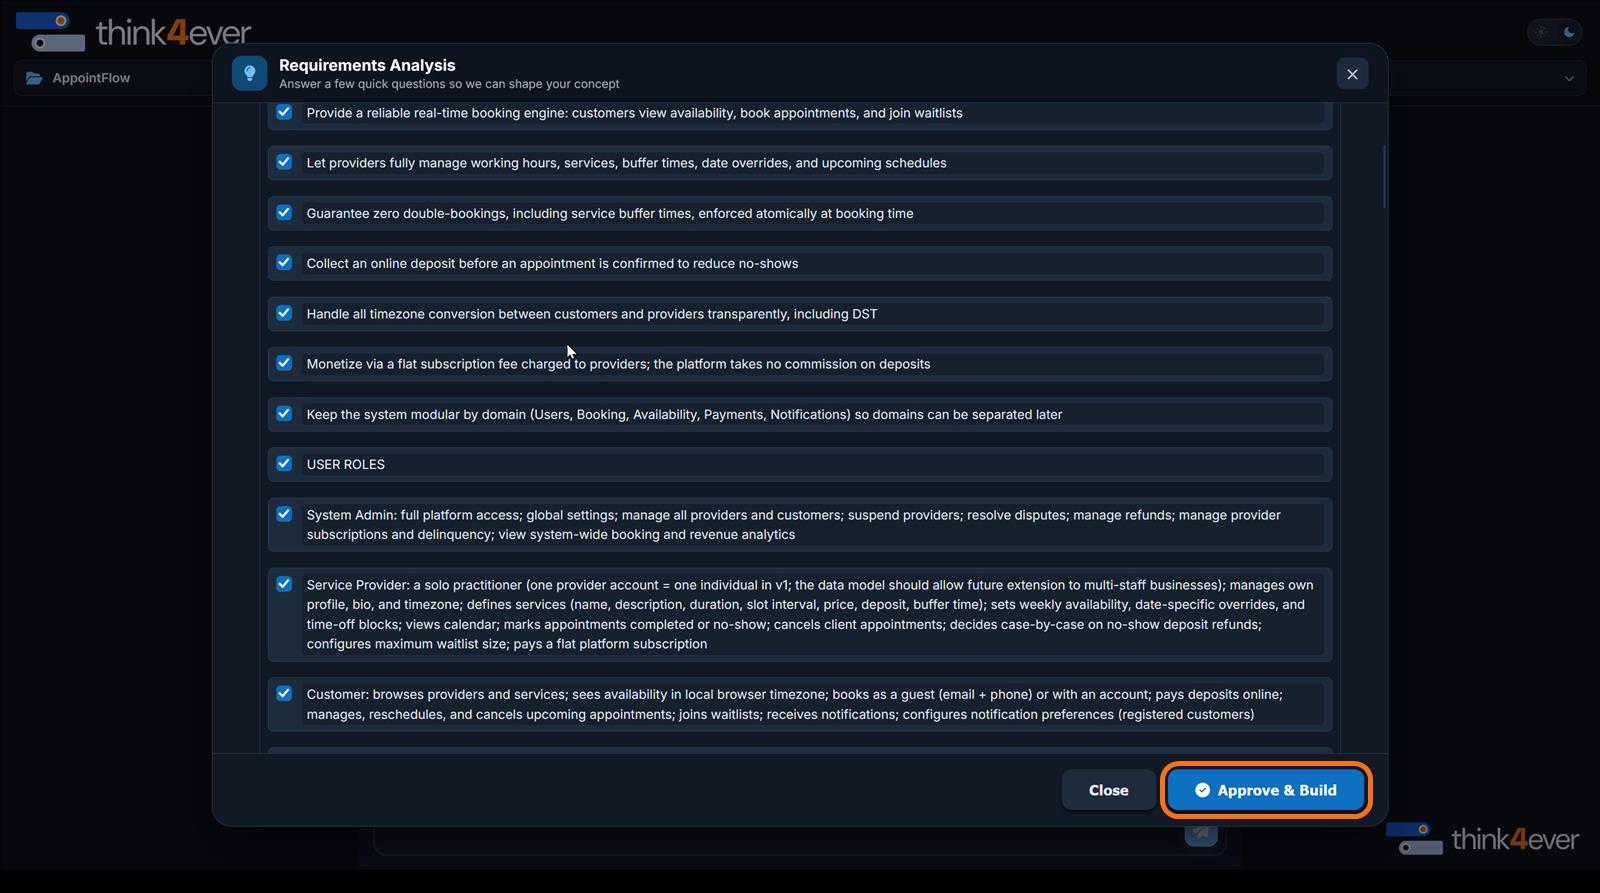
- Approve the blueprint. Review the assembled goals, roles, rules, workflows and technical decisions. Fix anything incomplete or contradictory, then click Approve & Build. This is the handoff from product definition to generated design.
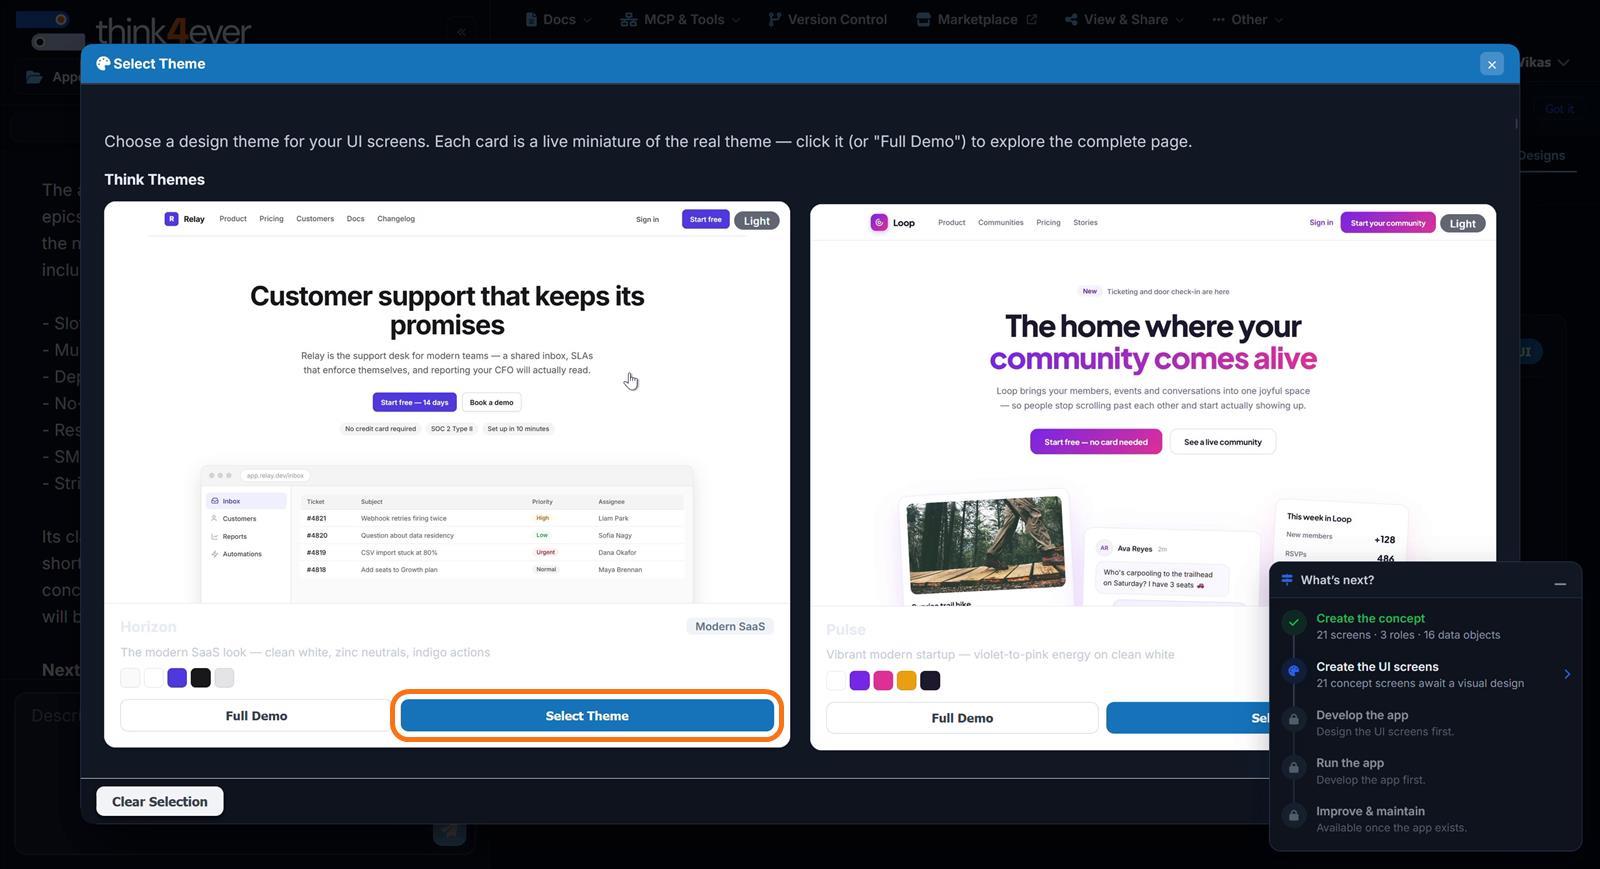
- Choose a theme. Pick the visual theme that fits the product. Click Full Demo to explore a theme, then Select Theme.
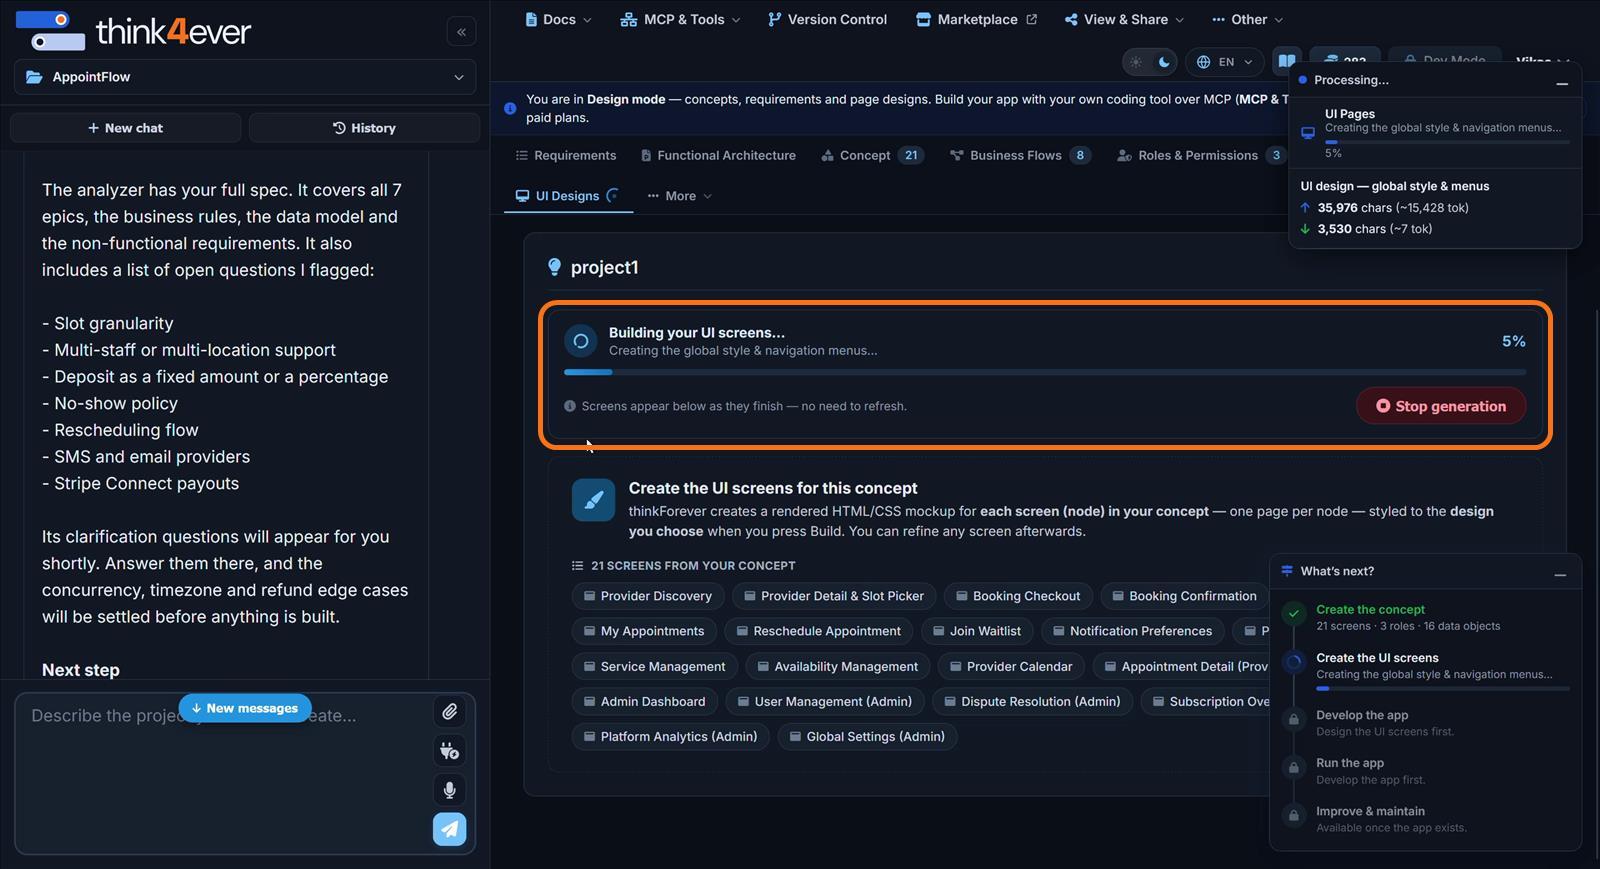
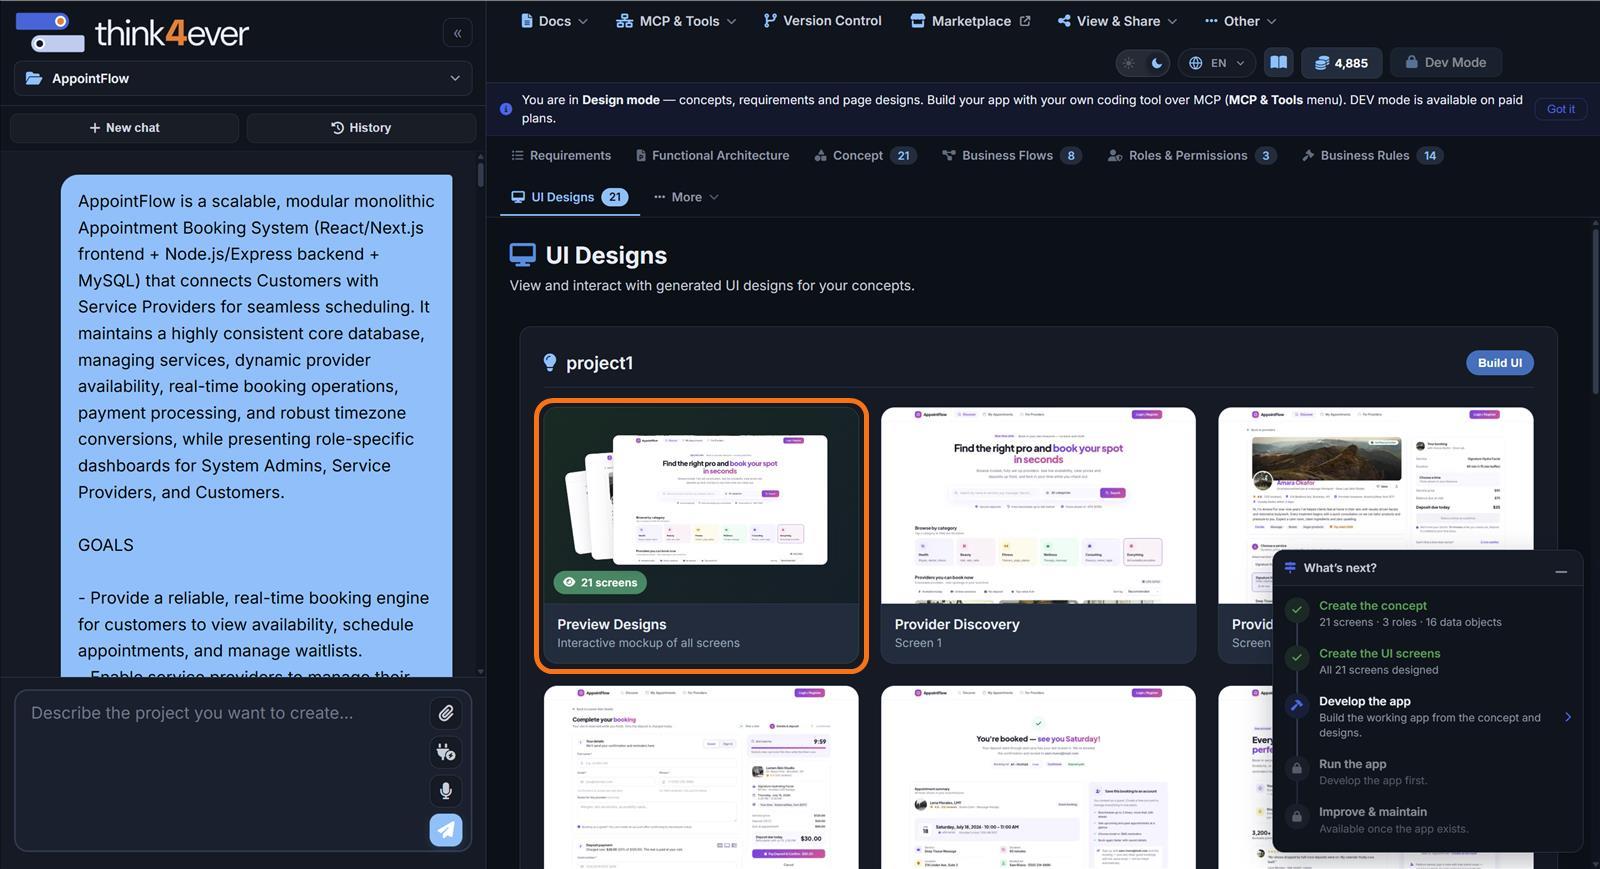
- Generate the UI. Start the UI build and wait for it to finish. Screens appear as they are completed. AppointFlow got 21 screens covering customer, provider and admin flows.
- Review the screens. Open UI Designs and check the gallery and the interactive Preview Designs mockup across all the main flows. Fix missing screens or product decisions in Think4Ever before you start coding.
Step 2: Connect Codex to Think4Ever
You connect once. After that, every Codex session on your computer can read your Think4Ever designs.
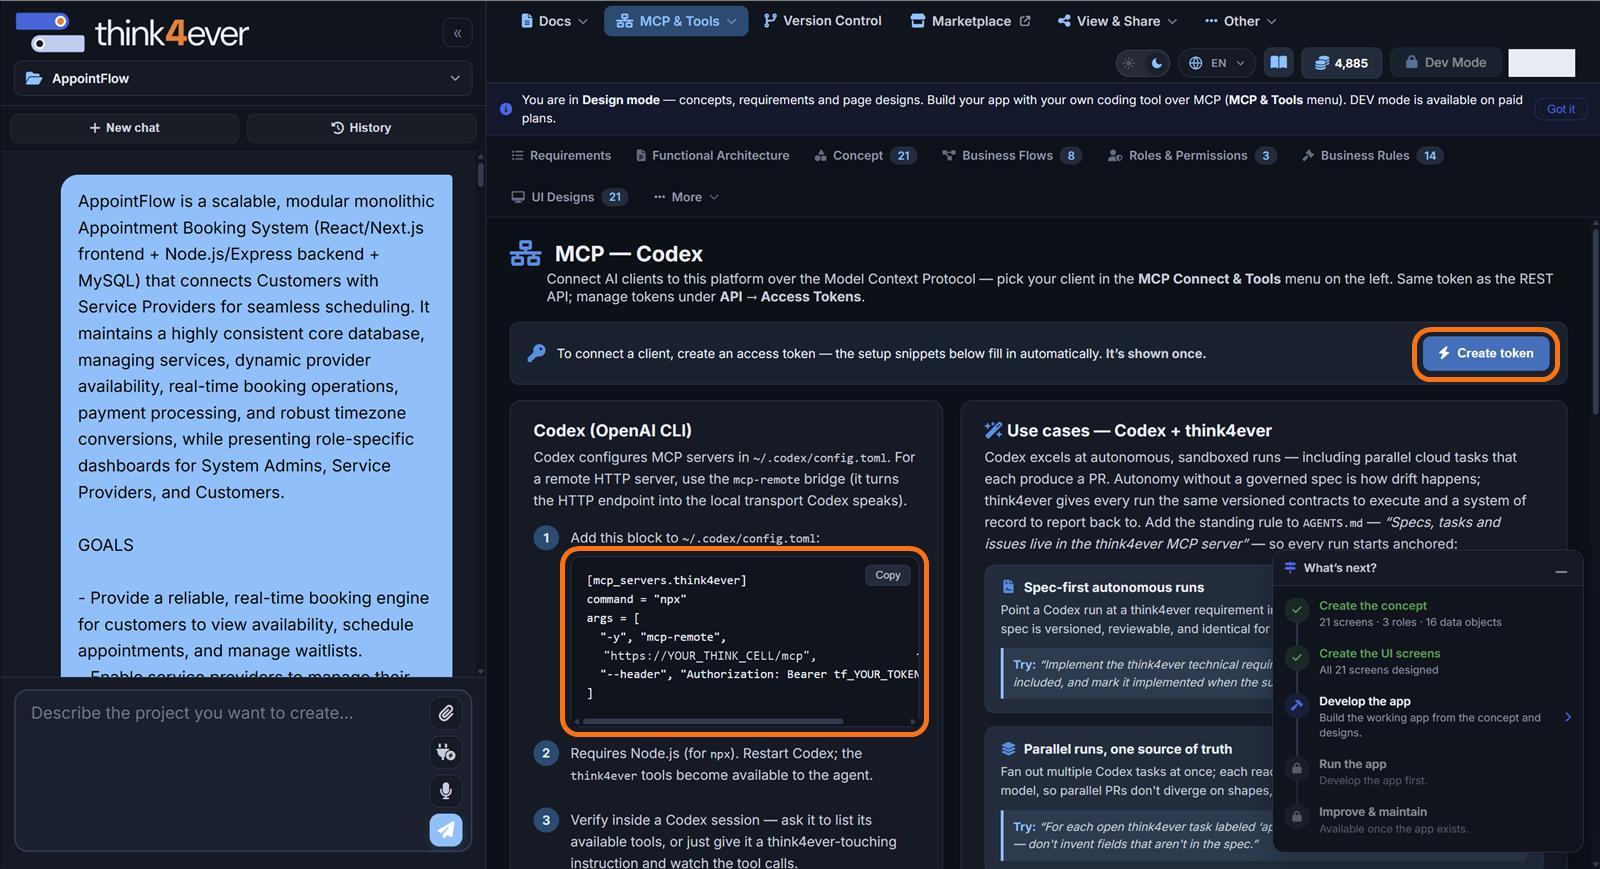
- In your Think4Ever project, open MCP & Tools → Codex.
- Click Create token and copy it straight away. It's shown only once. Manage or revoke tokens later under API → Access Tokens.
- Copy the generated configuration block into your Codex config file,
~/.codex/config.toml. Codex reaches Think4Ever's HTTP server through the mcp-remote bridge. The block looks like this, with your own server address and token:
[mcp_servers.think4ever]
command = "npx"
args = [
  "-y", "mcp-remote",
  "https://YOUR_THINK_CELL/mcp",
  "--header", "Authorization: Bearer tf_YOUR_TOKEN"
]- Save the file and restart Codex. The think4ever tools load in the new session.
- Check the connection: ask Codex to list its think4ever tools, or to name your active project.
Never commit the token to your repository.
Step 3: Give Codex the build brief
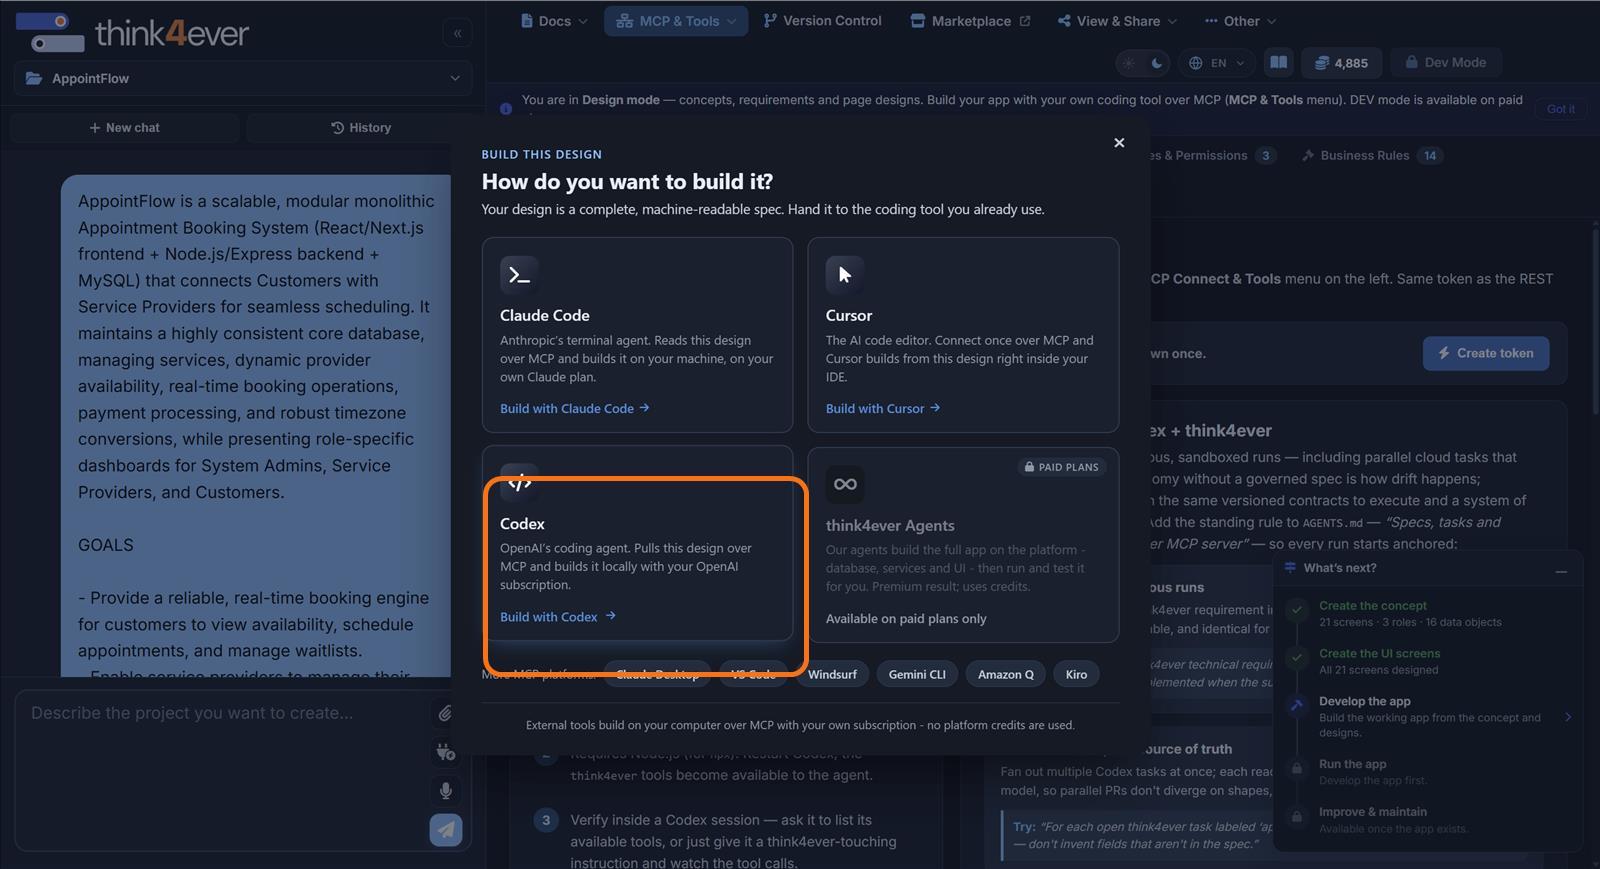
- Choose Build with Codex. In UI Designs, click Build UI. In How do you want to build it?, choose Codex. Codex builds on your computer with your OpenAI subscription, so no Think4Ever credits are used.
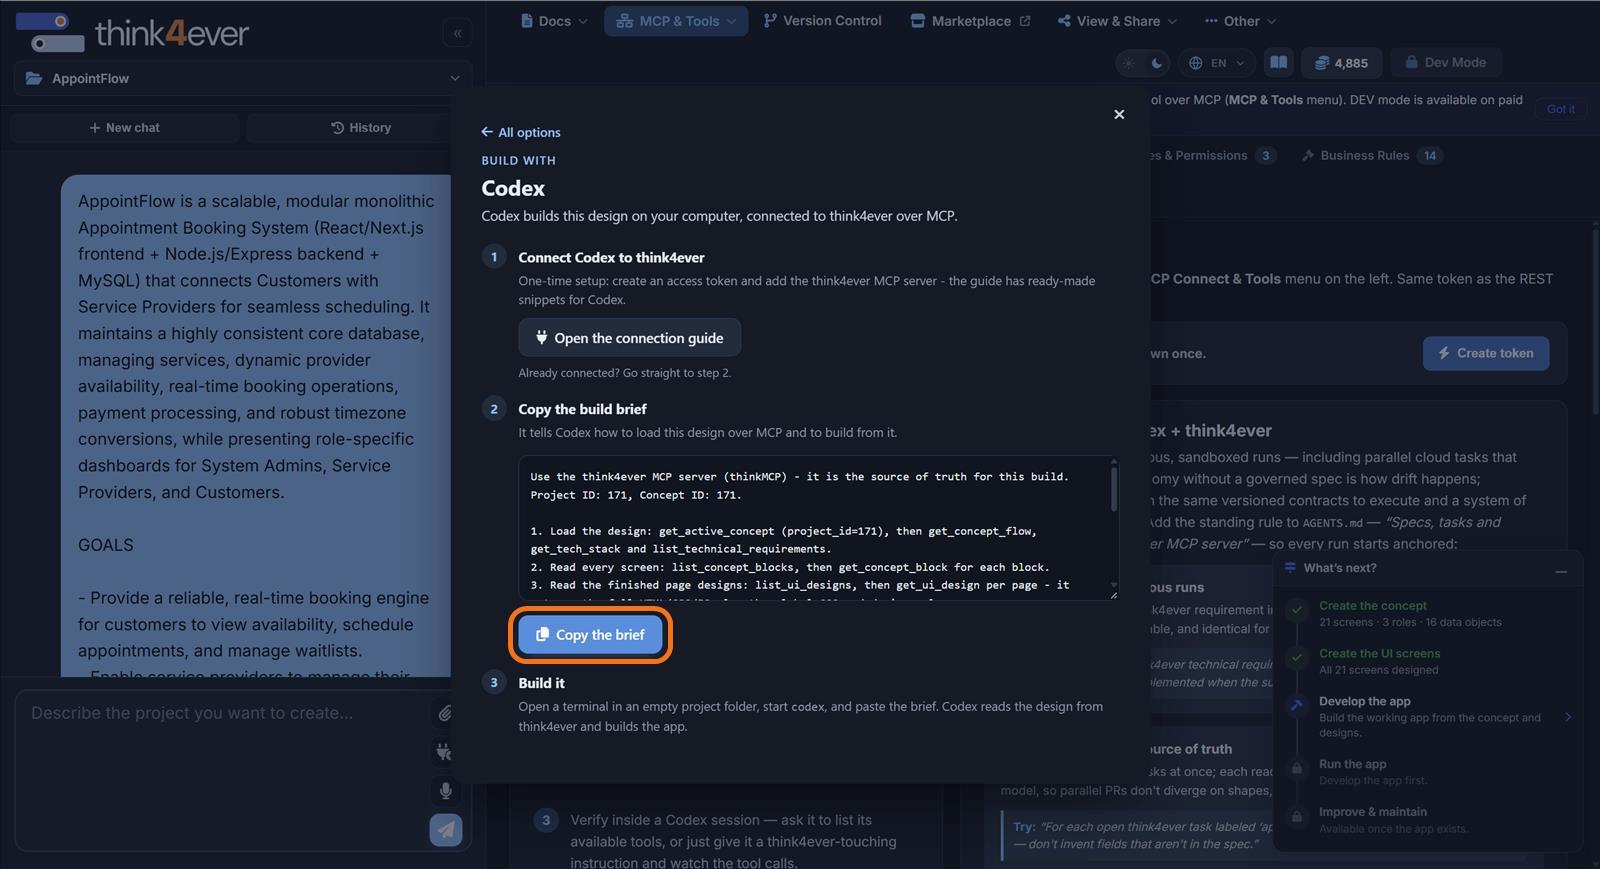
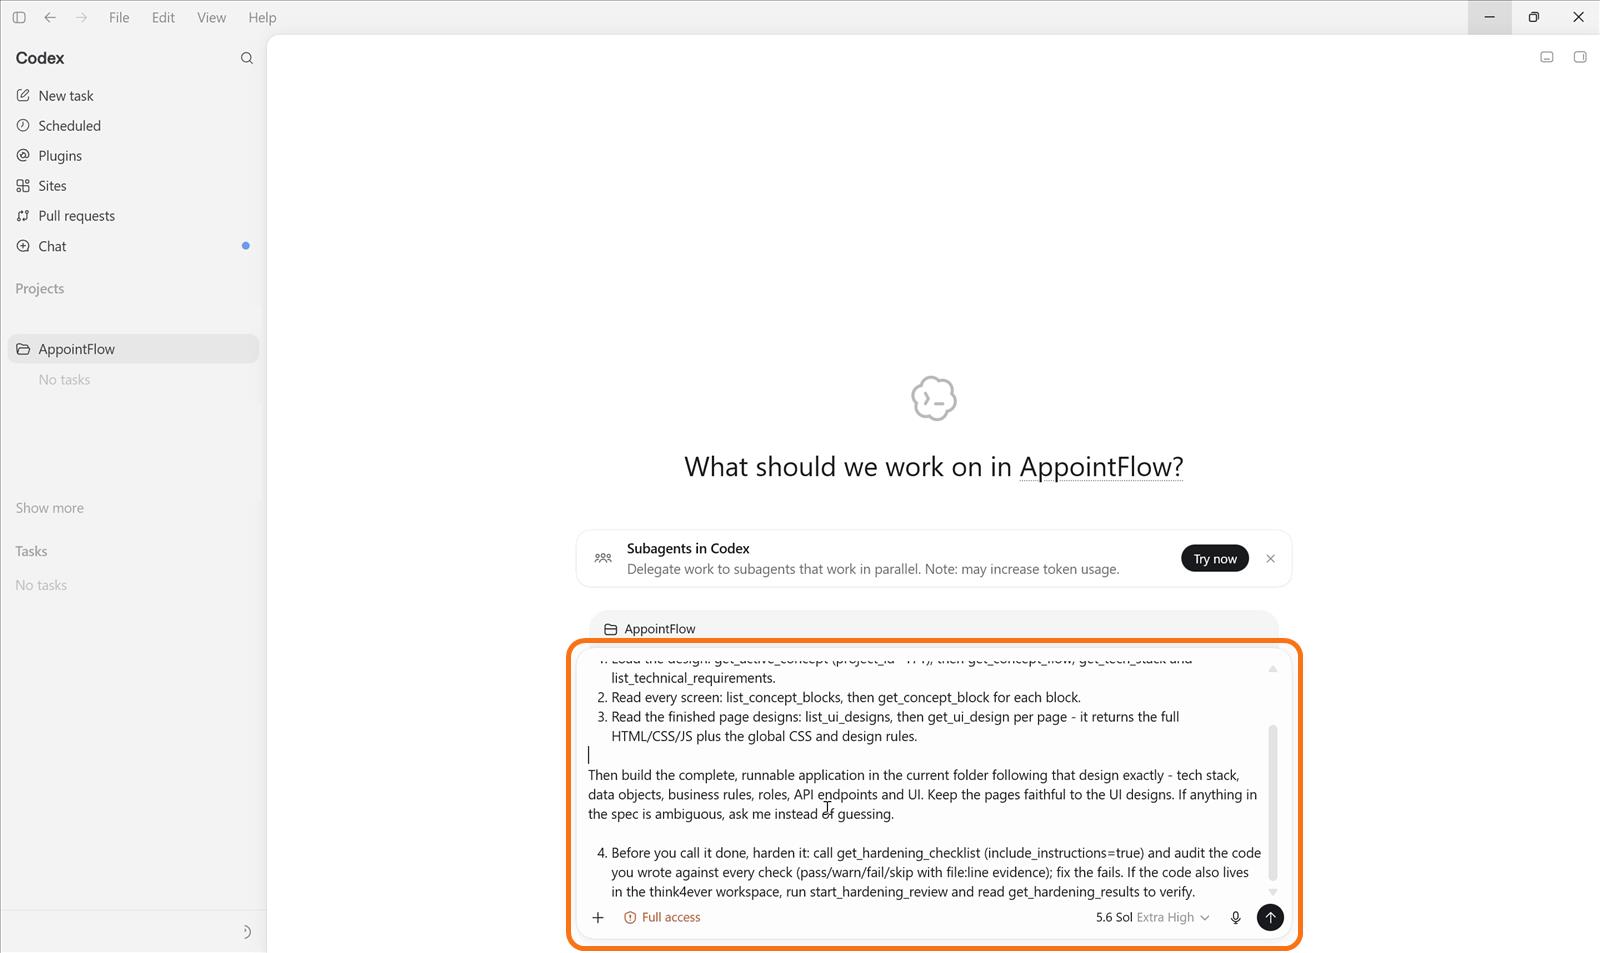
- Copy the brief. The Codex panel recaps the one-time connection (with a link to Open the connection guide) and shows a project-specific build brief. Click Copy the brief. The brief names your project and concept, and tells Codex to load the active concept, technical requirements, every concept block and every UI design before writing code. Copy it again whenever you switch projects or rebuild the concept.
- Open an empty project folder. In Codex, create or select an empty folder and open it as the project root. Codex writes the application and its project instructions there.
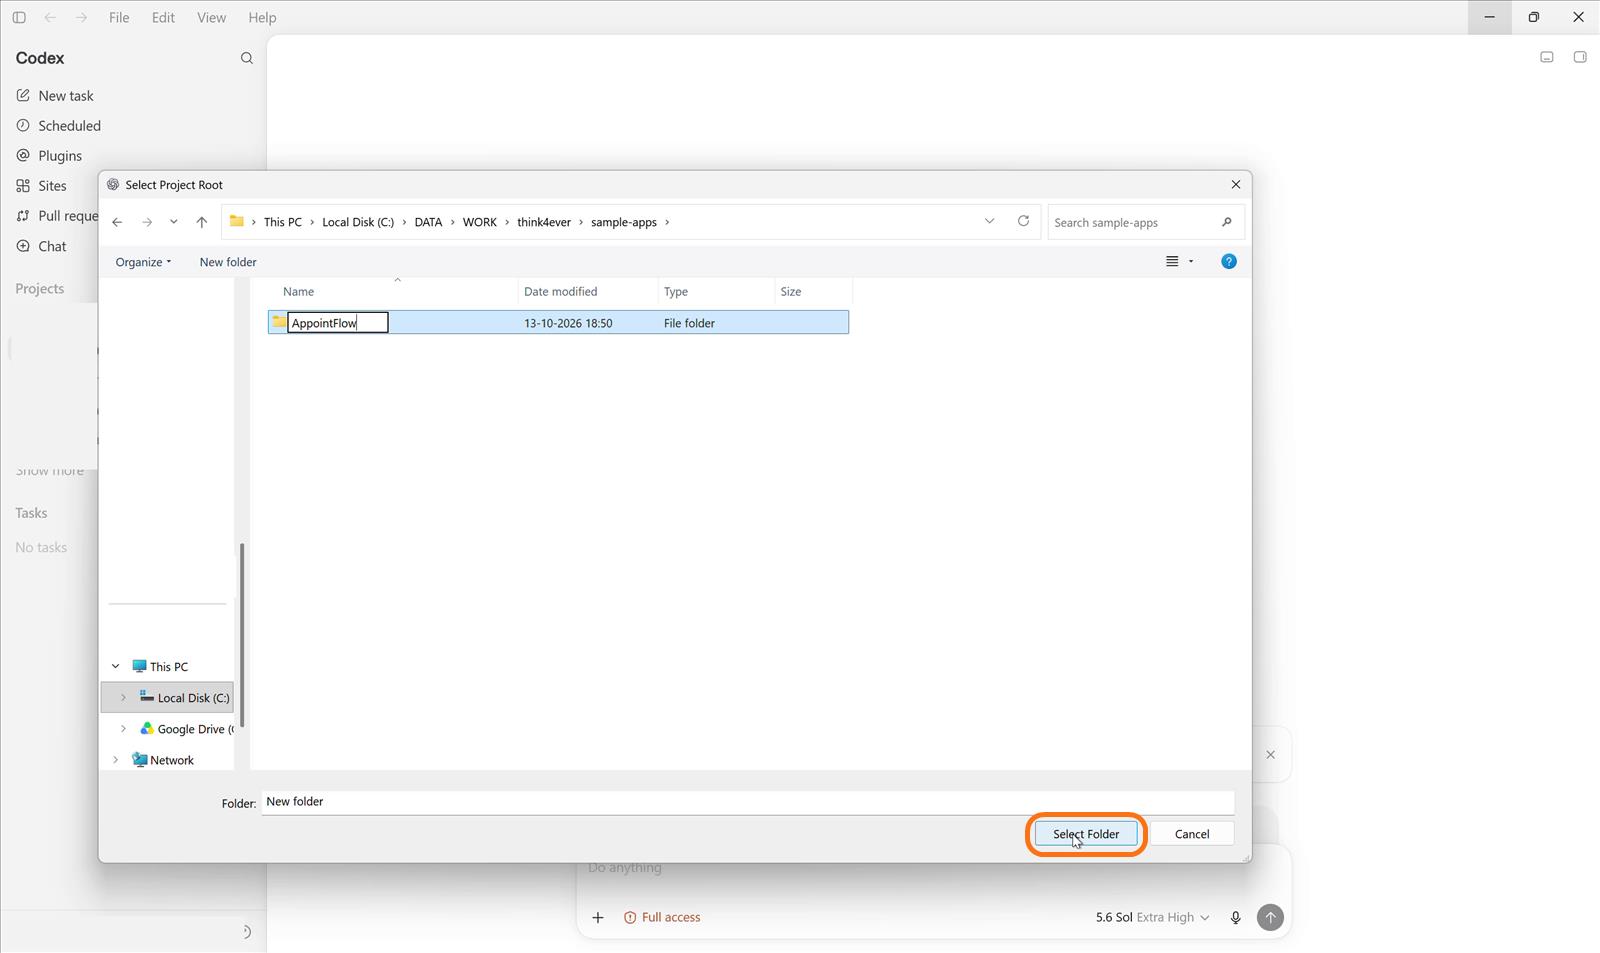
- Paste the brief and send it. Start a new task, paste the whole brief and send it. Let Codex load the design from Think4Ever before it creates any files. The brief also tells Codex to ask instead of guessing when the spec is unclear, and to check its code against Think4Ever's hardening checklist before calling the build done.
Step 4: Build and verify the app
Codex scaffolds the application, installs dependencies, runs its checks and compares the result with the Think4Ever design. Approve each command only when it fits your project and environment.
When it's done, check that:
- The tech stack matches the Think4Ever technical requirements
- Every important screen in Think4Ever has a route or app state
- Roles, permissions, validation, error states and business rules are enforced in code
- Layout, forms, navigation and responsive behavior match the UI designs
- Tests and the production build pass, and the app starts from a clean checkout
Useful follow-up prompts
- "Compare the current app with every Think UI design and list the remaining differences before changing code."
- "Run the tests and production build, fix failures, then summarize the commands and results."
- "Reload the Think role definitions and check every route for missing permission enforcement."
Troubleshooting
Codex doesn't see the think4ever tools. Restart Codex after changing config.toml. If the bridge won't start, check that Node.js and npx are installed.
Authentication errors. Create a new token in Think4Ever, replace the old one in config.toml, and restart Codex. Revoke any token that was exposed.
Codex opens the wrong design. Copy a fresh build brief and check its project and concept IDs.
The app drifts from the design. Ask Codex to reload the relevant Think4Ever screens and business rules before it edits more code.
References
- How to: Design in Think, Code in Claude, the same workflow with Claude Code
- OpenAI Codex MCP documentation